- Documentation
- FreeSewing Designs
- Benjamin bow tie
- Benjamin bow tie: Sewing Instructions
Benjamin bow tie: Sewing Instructions
Notes and tips
Precision
Since a bow tie is a rather small item, precision with sewing is key to a good result. Any slight difference between the upper and lower part of the bow will stand out. To get a great result I found it very helpful to trace the actual seam lines onto the interfacing and follow that while sewing.
Press wisely
Later in the construction steps, you will be asked to press your fabric. Please be careful that you are not using too much heat on a delicate fabric that can’t handle it.
It’s a good idea to try pressing some fabric scraps before you start. This will allow you to figure out what is a good heat setting for the fabric you are using.
Choosing your grain
This pattern includes a grain line. This grain line is mostly there to be used with the interfacing. Since each pattern piece is interfaced, the grain line of the fabric itself is not so important. You can even change this from the standard for more informal impressions.
If this all sounds very confusing, might I suggest reading the help page on Fabric grain.
Bow tie adjustment ribbon and hardware
By default, this design makes a fixed-length bow tie that is the right length for a certain neck size. However, by enabling the Adjustment Ribbon option, it can also make a tie that uses an adjustment ribbon and hardware that makes the bow tie adjustable to different neck sizes. This is useful if not all of your shirts have the same neck measurements, or if you sometimes like shirts with more ease in the neck.
These adjustment ribbons and bow tie hardware can be found in the better haberdasheries or can be ordered online.
These instructions are for the type of adjustment ribbon that comes with holes at regular intervals, to be used in combination with two-piece hardware consisting of an oval loop part and a part with a smaller loop and attached T-shaped hook.
There are other styles of bow tie ribbons and hardware, but their use is outside the scope of these instructions.
Seam allowance
Since the bow tie is constructed with the right sides of the fabric against each other, the whole thing will have to be turned inside out. You probably want to consider using a small seam allowance of 6mm (¼ inch) to reduce the bulk.
Construction
Step 1: Apply interfacing
Apply interfacing to all parts where you feel it’s needed.
Without adjustment ribbon
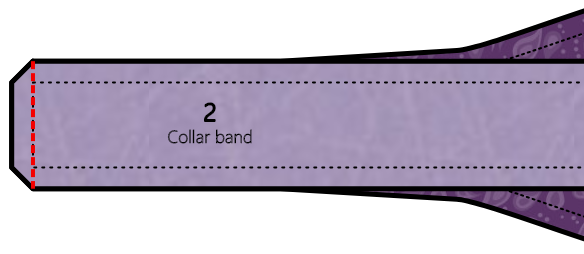
Step 2: Sew the bow to the collar band
Put one of the Collar Band parts on one of the Bow parts, right sides together. Align the ends of both parts. Now sew across the end to join the parts.
In a similar fashion, sew a second Bow part to the other end of the same Collar Band.
Repeat these steps to sew the other 2 Bows to the other Collar Band.
Press open all the seams.
You now have two identical single sided bow ties.
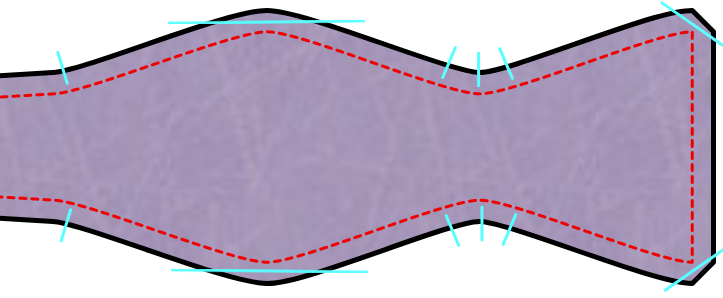
Step 3: Join both sides

Lay both the sides you made on top of each other, right sides together. Sew all along the edges, but leave an area of 5 cm open in the middle of the collar band. Through this opening we will turn the bow tie right side out.
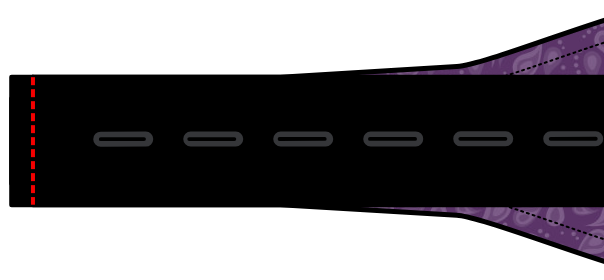
Step 4: Turning
Clip the seam allowance back in the usual spots and make little cuts to allow for a smooth curves.
Then use the back of a large crochet hook, or some other appropriately long skinny object, to turn the two sides right-side-out through the little opening. Start by gently pulling the two fabric pieces at the end of the bow apart. Then push the end of the bow up between the two pieces of fabric. Keep gently pushing while pulling the rest of the tie down over it. This can be a tedious procedure. Take your time and be gentle. It’s easy to push too hard and rip stitches or fabric.
Once you have the tie right side out, make sure you push all the corners and sides out before giving it a good press.
Step 5: Closing
Now all that is left is closing the little hole we used to turn the bow tie right side out. You can do this by hand with a slip stitch, or a ladder stitch. Or you can use the machine and stitch right at the edge of the band. Since this will normally be hidden by the collar of your shirt, it will not be all that obvious.
Now give it one last press and admire your work.
With adjustment ribbon
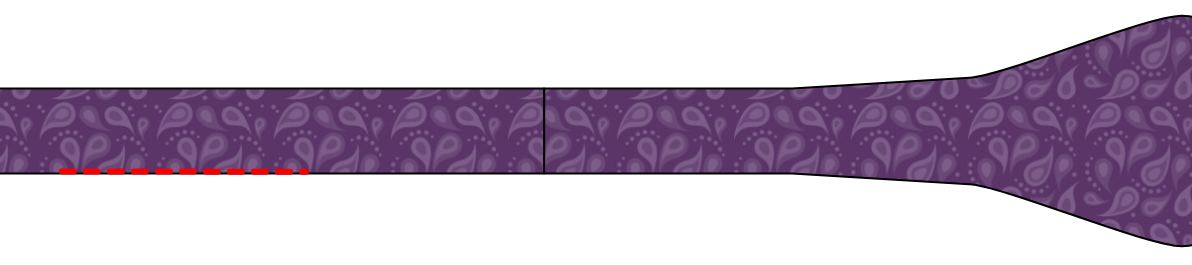
Step 2: Attaching the ribbon
The first thing to do is to sew the adjustment ribbon to the Short Bow part. The ribbon should be 290mm long. If it is different, you have to make sure that you align it such that the ribbon and short bow piece together are as long as the long bow piece.
Put right sides of the Short Bow piece and the ribbon together.
Now sew across the end to join the parts.
Step 3: Join both sides
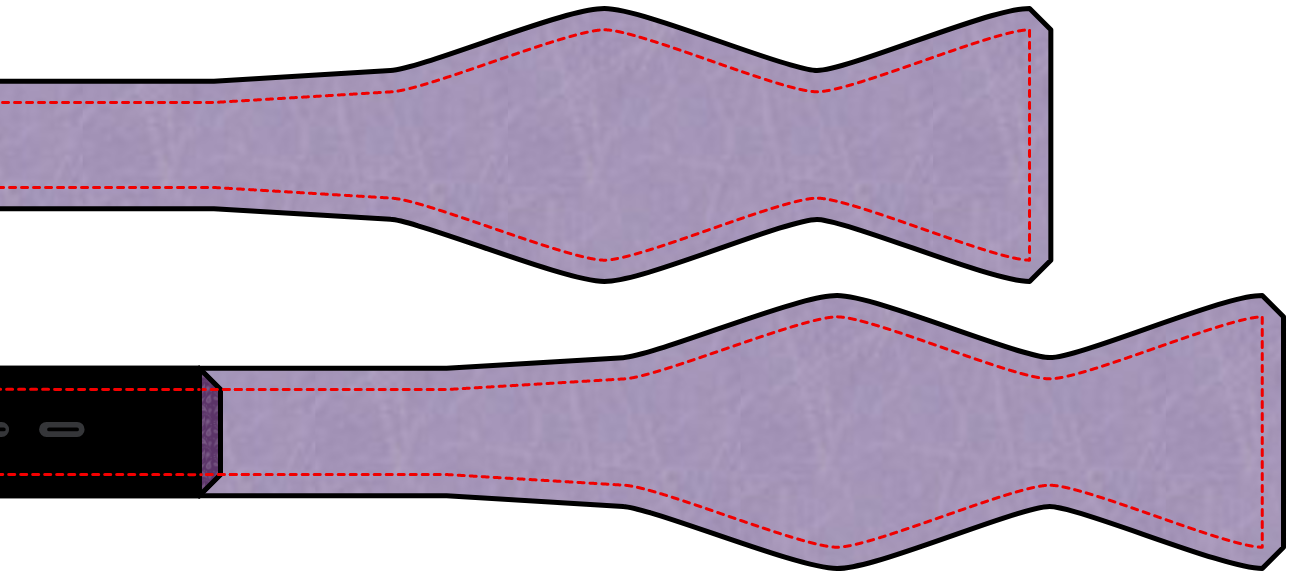
Lay both of the Medium Bow parts on top of each other, right sides together.
Sew all along the edges, but leave the short end open. Through this opening we will turn the bow tie part right side out.
Lay the Long Bow on top of the ribbon and Short Bow part, also right sides together.
Again, sew all along the edges, leaving the short end open.
Step 4: Turning
Clip the seam allowance back in the usual spots and make little cuts to allow for a smooth curves.
Then use the back of a large crochet hook, or some other appropriately long skinny object, to turn the two parts right-side-out through the ends. Start by gently pulling the two fabric pieces at the end of the bow apart. Then push the end of the bow up between the two pieces of fabric. Keep gently pushing while pulling the rest of the tie down over it. This can be a tedious procedure. Take your time and be gentle. It’s easy to push too hard and rip stitches or fabric.
Once you have the part right side out, make sure you push all the corners and sides out before giving it a good press.
Do this with both parts.
Step 5: Add hardware
Now we need to add the two pieces of hardware that make the bow tie adjustable. The oval loop piece will be attached to the part without the adjustment ribbon. And, the piece with the T-hook will go on the part with the ribbon.
First do the part without the ribbon. This is because the fabric tail of the ribbon piece will have to go through the oval part before sewing on its hardware. If you would do it in the other sequence, you may not be able to feed it through.
To finish the ends, we’re going to fold the fabric in three steps, before sewing it in a fourth step:
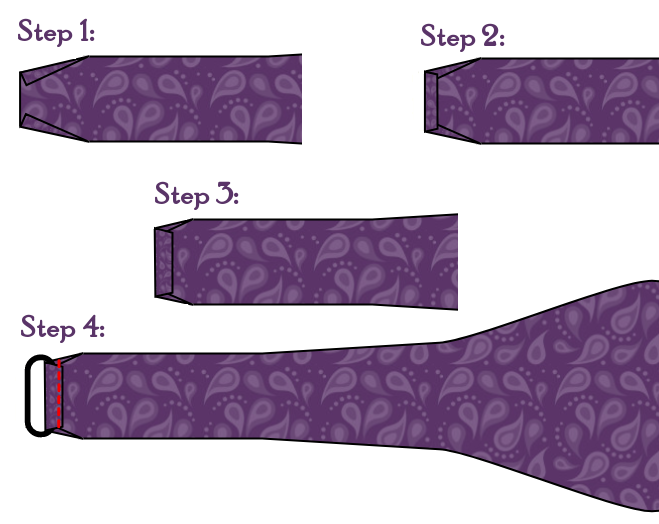
- First we fold the sides in at an angle.
- Then we fold the end over by just a small seam allowance, something like 5 mm.
- Then we fold it over again, for about 1 cm.
- Finally we stick the oval loop under this last fold and stitch across.
Now feed the adjustment ribbon piece through the oval loop, and attach the T-hook to the end of the ribbon, sewing it in the same way.
Hook the T in one of the adjustment holes and your bow tie is done!